


It’s a universally frustrating experience. You stand under the harsh, unforgiving lights of a beauty aisle, your hand covered in mismatched stripes of foundation. You choose one that looks promising, only to get home and discover it gives your face a ghostly pallor, an unnaturally orange tint, or creates a dreaded “mask” effect along your jawline. The bottle is then relegated to a drawer, another victim of the great foundation guessing game.
What if you could end this cycle of expensive trial and error for good?
The secret to finding a truly perfect foundation match lies in understanding two key concepts: your skin tone (its depth) and, more importantly, your undertone (its underlying hue). This is the code that, once cracked, unlocks flawless results every time. In this definitive guide, we will provide you with the foolproof, step-by-step methods that professional makeup artists use to analyze skin and select a foundation shade that looks like real, perfected skin, not makeup.
Part 1: The Two Pillars of a Perfect Match: Skin Tone vs. Undertone
Before you can find your match, you must understand what you’re matching. Your overall skin color is composed of these two distinct elements.
- Skin Tone (or Shade Level): This is the surface color or depth of your complexion. It’s what we typically describe as “fair,” “light,” “medium,” “tan,” “deep,” or “rich.” Your skin tone can change throughout the year—you might be a “light-medium” in the winter and a “medium-tan” in the summer.
- Undertone: This is the subtle, permanent hue that lies beneath your skin’s surface. It does not change with sun exposure. It’s the color that shines through and gives your skin its overall quality. Getting this right is the most critical part of shade matching. A foundation that matches your skin tone depth but clashes with your undertone will always look “off.”
Think of it like painting a room: the skin tone is the primary color you see (e.g., beige), but the undertone is the specific tint mixed in that makes it a “cool beige” or a “warm beige.”
Part 2: Cracking the Code – The Definitive Guide to Identifying Your Undertone
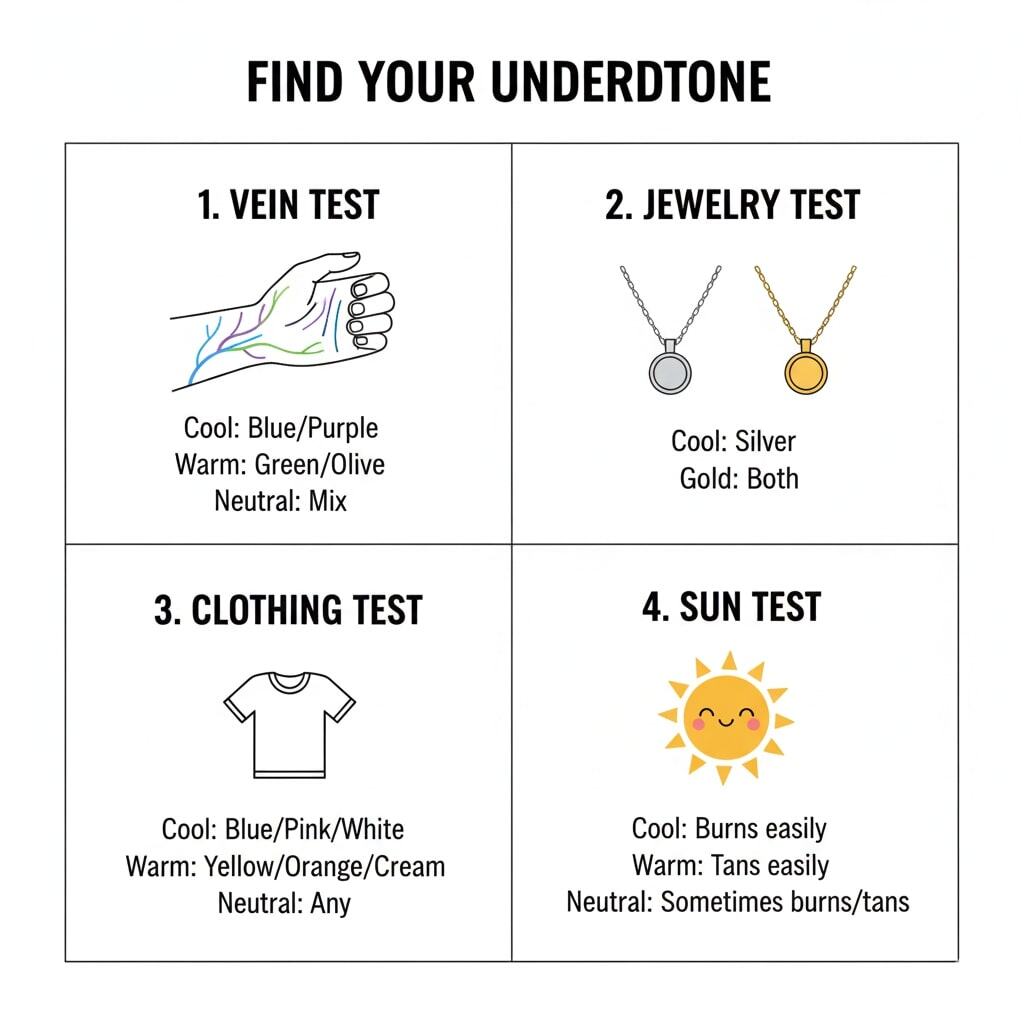
This is where the real detective work begins. Use a combination of these tests in natural daylight for the most accurate reading.
The Vein Test: A Classic Starting Point
Look at the inside of your wrist. The color of your veins can give you a strong clue.
- Cool Undertone: Your veins appear predominantly blue or purple.
- Warm Undertone: Your veins appear predominantly green. (They are still blue, but the yellow hue of your skin makes them appear green).
- Neutral Undertone: You see a mix of both blue and green, or it’s difficult to tell which color is more prominent.
The Jewelry Test: Metal as a Mirror
Which type of metal jewelry makes your skin look most radiant and alive?
- Cool Undertone: You gravitate towards silver, platinum, or white gold. Gold can sometimes make your skin look sallow or washed out.
- Warm Undertone: You feel you look best in traditional yellow gold or rose gold. Silver can sometimes make you look ashy or pale.
- Neutral Undertone: You can wear both silver and gold effortlessly without one looking noticeably better than the other.
The White Fabric Test: The Color Comparison
Grab two pieces of clothing: one stark, pure white, and one off-white or cream. In natural light, hold each one up to your bare face.
- Cool Undertone: The pure white fabric complements your skin, while the cream can make you look dull.
- Warm Undertone: The cream or off-white fabric makes your skin glow, while the stark white can be jarring and wash you out.
- Neutral Undertone: You look good in both, with no significant negative effect from either color.
The Sun Test: Burn or Tan?
Think about how your skin reacts to sun exposure without protection.
- Cool Undertone: You tend to burn easily and rarely tan.
- Warm Undertone: You tan easily and rarely burn.
- Neutral Undertone: You might burn first, but it then develops into a tan.
The Often-Overlooked Undertone: Are You Olive?
Olive is a unique undertone that doesn’t fit neatly into the main three categories. It can be present in any skin tone depth, from fair to deep.
- What It Is: Olive skin has a subtle green, grayish, or yellow-green cast. It is technically a combination of a neutral base with a yellow-warm overtone and a green hint.
- The Common Problem: People with olive undertones often struggle immensely because foundations labeled “Warm” look too orange, and foundations labeled “Neutral” look too pink or peachy.
- How to Identify It: If you’ve tried everything and nothing seems right, or if you find that you look exceptionally good in earthy green, khaki, and muted jewel tones, you may have an olive undertone.
Part 3: The Practical Test – How to Swatch Foundation Like a Professional
Once you have a hypothesis about your undertone, it’s time to test it in the real world.
Step 1: Ditch the Wrist The most common mistake is testing foundation on the back of your hand or your wrist. The skin here is often a different color and texture from your face. It gets more sun exposure and is not an accurate representation.
Step 2: The Three-Stripe Jawline Method
- Select Your Contenders: Based on your skin tone and suspected undertone, choose three shades that look like close possibilities.
- Apply in Stripes: Apply a short, distinct stripe of each shade on your jawline, extending from your lower cheek down to your upper neck. Place them side-by-side without blending them in. This area is perfect because it allows you to match your face and neck simultaneously for the most seamless look.
Step 3: The Critical “Wait and See” Rule Do not make a decision immediately. You must account for oxidation—a chemical reaction where the pigments in the foundation interact with the oils and air, causing the shade to darken.
- The Process: After applying your stripes, go about your shopping for at least 10-15 minutes. This gives the foundation time to dry down and reveal its true color on your skin.
Step 4: The Final Judgment in Natural Light Store lighting is designed to be flattering and can be incredibly misleading (often fluorescent or overly warm).
- The Process: After your 15-minute wait, find a doorway or window. Using a mirror, examine your swatches in natural daylight. Two of the shades will likely be visible. The correct shade will be the one that seems to disappear into your skin, creating a seamless transition from your face to your neck.

Part 4: Decoding Foundation Lingo & Using Online Tools in 2025
Understanding how brands label their foundations can help you narrow down your choices online and in-store.
- Letters as Identifiers: Many brands use a simple letter system to denote undertone:
- C: Cool (often has a pinkish/rosy base)
- W: Warm (often has a yellowish/golden base)
- N: Neutral (a balanced mix of cool and warm)
- P/R: Pink/Rosy (alternative for Cool)
- Y/G: Yellow/Golden (alternative for Warm)
- O: Olive
- Numbers as Levels: The number accompanying the letter typically indicates the shade depth, with lower numbers being lighter and higher numbers being darker. For example, a shade like “Light 4N” is for a Light skin tone with a Neutral undertone.
Using Online Shade-Matching Tools: Websites like Findation and Temptalia’s Foundation Matrix are invaluable. If you know a foundation shade that is a perfect match for you in one brand, you can input it, and the tool will generate a list of likely matches in dozens of other brands. This is an excellent starting point for online shopping.
A critical piece of the puzzle we mapped out in our Ultimate Guide to a Flawless Foundation Base.
FAQ Section: Your Foundation Matching Problems, Solved

- 1. My face is darker/lighter than my neck. What do I match to? Always match to your neck and chest. If you match to your face, you will create a visible line of demarcation. It’s much easier to use a bit of bronzer to add warmth and dimension to your face to match your body than it is to blend a mismatched shade down your neck.
- 2. What do I do if I seem to be perfectly between two shades? This is extremely common. The professional solution is to buy both shades. This allows you to create your perfect custom-mixed color. It’s also a smart investment, as you can use more of the lighter shade in the winter and more of the darker shade in the summer, adjusting your mix as your skin tone changes.
- 3. The undertone is right, but the shade is still slightly off. How can I fix it? This is where shade-adjusting drops become your secret weapon. These are highly pigmented liquids you can add in tiny amounts to your foundation.
- Blue Drops: Neutralize a foundation that is too orange or yellow.
- Yellow Drops: Add warmth to a foundation that looks too pink or rosy.
- White/Dark Brown Drops: Adjust the shade level lighter or darker without altering the undertone.
- 4. How does my skin type affect my foundation shade choice? Your skin type affects the formula, which can influence the color. Dewy, hydrating foundations often appear more forgiving and can sheer out slightly. Matte, long-wearing foundations tend to be more opaque and can sometimes oxidize more noticeably, so waiting to see the final dry-down color is even more critical.
- 5. I have an olive undertone. Are there any specific brands I should look for? Yes! As of 2025, many brands have expanded their ranges to cater to olive skin. Look at brands like Fenty Beauty, KOSAS, Haus Labs, and NARS, which have become known for their nuanced and extensive shade ranges, often including specific olive-toned options.
Conclusion: From Guesswork to Guarantee
Finding your perfect foundation is not a matter of luck; it is a skill based on observation and technique. By taking the time to truly understand your skin’s unique undertone and by adopting the professional jawline swatch method, you are removing the guesswork from the equation. You are equipping yourself with the knowledge to walk into any store or browse any website with confidence, knowing you can select a shade that will look like your skin, only better. The days of the foundation graveyard in your drawer are officially over.

