


We’ve all been there. You spend time carefully applying your foundation, only to catch a glimpse in a different light and see it: the dreaded cakey texture, the awkward streaks, or the way it has settled into every single fine line. The quest for a flawless foundation base can feel like a frustrating, endless cycle of trial and error.
But what if you could get it right, every single time?
This is not just another foundation tutorial. This is your definitive, master guide for 2026. We are going beyond the basics to give you the expert techniques, pro secrets, and troubleshooting tips that makeup artists use. Whether you’re a complete beginner or feel like you’ve tried everything, you will leave this page with the knowledge to create a smooth, radiant, second-skin base that lasts all day.

What You’ll Learn In This Master Guide:
- Part 1: The Canvas: The non-negotiable skin prep for a smooth finish.
- Part 2: Prime Time: Choosing a primer that works with your skin, not against it.
- Part 3: The Main Event: A deep dive into foundation formulas, finishes, and tools.
- Part 4: Conceal and Perfect: Techniques for seamless, crease-proof coverage.
- Part 5: Add Dimension: How to sculpt and bring your base to life.
- Part 6: Lock It In: The secrets to making your makeup last 12+ hours.
- Part 7: The Troubleshooting Clinic: Fix common foundation problems like a pro.
- Part 8: Your Flawless Base Checklist: A scannable routine to save and use.
Part 1: The Canvas – Why Skin Prep is Non-Negotiable
Think of yourself as an artist. You wouldn’t paint on a dusty, uneven canvas. The same principle applies to your face. Excellent makeup application is 90% skin preparation.
- Step 1: Cleanse: Start with a gentle cleanser to create a clean slate.
- Step 2: Exfoliate (1-3 Times a Week): Dead skin cells are the primary cause of patchy, uneven foundation. Use a gentle chemical exfoliant (like Glycolic or Lactic Acid) or a soft physical scrub to reveal a smoother surface.
- Step 3: Hydrate & Moisturize: This is the most crucial step. Apply a moisturizer suitable for your skin type to plump the skin and prevent makeup from clinging to dry patches.
Makeup Artist Pro Tip: Wait at least 5-10 minutes after applying moisturizer before you move to primer. This allows it to fully absorb and prevents “pilling” (when products roll up into little balls).
For a complete routine with product recommendations and a deeper dive into the science of prepping your skin, explore our definitive guide: How to Perfectly Prep Your Skin for Makeup That Lasts All Day.
Part 2: Prime Time – The Strategic Bridge to Perfection
A primer is not just an “extra step”—it’s a strategic tool. It smooths texture, manages oil or dryness, and gives your foundation something to grip onto.
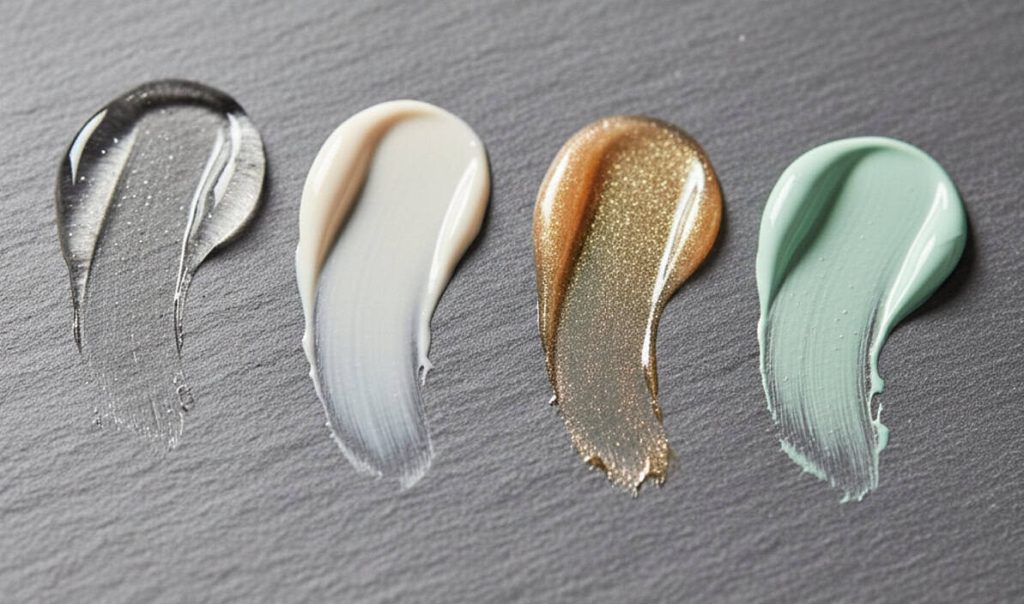
Choosing Your Primer:
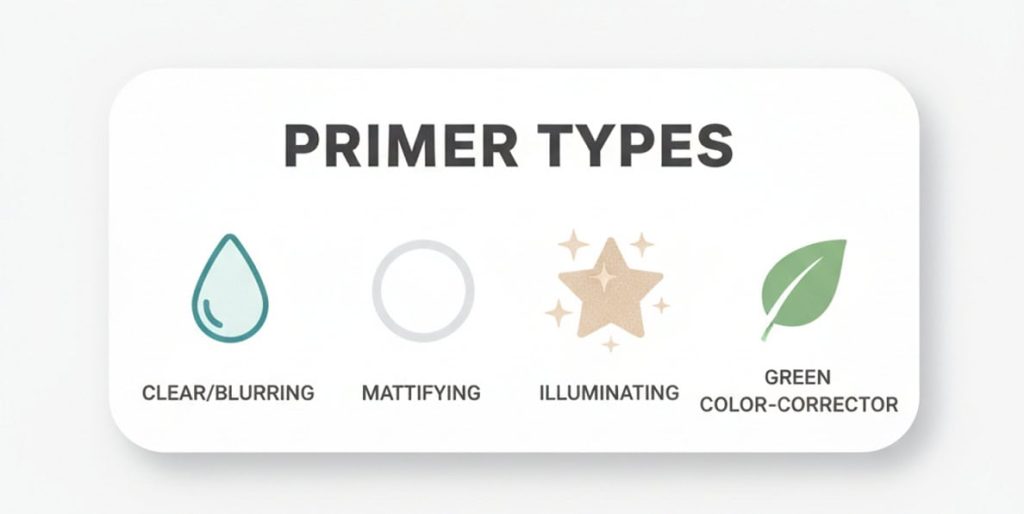
- For Oily Skin: Mattifying primers are your best friend.
- For Dry Skin: Look for hydrating or illuminating primers with ingredients like hyaluronic acid.
- For Large Pores or Fine Lines: Blurring or “pore-filling” primers create an ultra-smooth canvas.
- For Redness: A green-tinted primer will neutralize redness before you even apply foundation.
Expert Chemistry Tip: Pay attention to your product bases! A silicone-based primer works best with a silicone-based foundation. A water-based primer works best with a water-based foundation. Mixing them can sometimes cause separation on the skin.
If you’re still confused about which formula to choose based on your specific skin concerns, our in-depth breakdown can help: Are You Using the Right Primer? The Definitive Guide for Oily, Dry & Combination Skin.
Part 3: The Main Event – Decoding Your Perfect Foundation
This is the heart of your base. Let’s demystify the process of finding “The One.”
A) Finding Your Shade and Undertone Like a Pro
The biggest mistake people make is choosing the wrong undertone.
- Cool: Pink, red, or bluish hues.
- Warm: Yellow, peachy, or golden hues.
- Neutral: A balance between cool and warm.
- Olive: A subtle green/grayish hue, often mistaken for warm or neutral.
The Jawline Swatch Test: Apply 3 stripes of potential shades on your jawline and walk over to a window. The shade that disappears into your skin is your match. Your neck is often lighter than your face, so matching to where your face and neck meet creates the most seamless look.
For a foolproof method that includes our 4-step undertone test and tips for swatching like a pro, see our full guide: Foundation 101: The Foolproof Guide to Finding Your Perfect Shade and Undertone
B) Foundation Formula & Finish Cheat Sheet
| Formula | Coverage | Finish | Best For Skin Type |
| Liquid | Sheer to Full | Dewy, Satin, Matte | All skin types (most versatile) |
| Cream | Medium to Full | Satin, Natural | Dry, Mature, Normal skin |
| Powder | Light to Medium | Matte | Oily, Combination skin |
| Serum/Tint | Sheer to Light | Natural, Radiant | Normal, Dry, Minimal Texture |
To master the difference between the core finishes, explore our Dewy vs. Matte Guide, and to learn about the latest aesthetic trends, check out our breakdown of “Glass Skin” vs. “Cloud Skin”.
C) Application Tools: Choosing Your Weapon
- Damp Makeup Sponge: For a natural, skin-like finish. Pro Tip: Use a rolling and pressing motion, not a wiping one.
- Foundation Brush: For higher coverage. Pro Tip: Use a dense kabuki brush and buff in small circles to eliminate streaks.
- Fingers: Excellent for melting product into the skin, especially for lighter formulas.
Part 4: Conceal and Perfect – Strategic, Crease-Proof Coverage
The goal is to use as little product as possible for the most impact.
- For Dark Circles: Use a hydrating concealer with a peachy or pink undertone to neutralize blue/purple tones. Apply it only on the dark areas (often the inner and outer corners), not in a big triangle.
- For Blemishes: Use a drier, matte concealer that is an exact match to your foundation. Use a tiny brush to pinpoint the spot, let it sit for 30 seconds to get tacky, then gently tap the edges to blend.
Are you making common mistakes? Find out in our guide: The 5 Concealer Mistakes That Are Secretly Aging You (And How to Fix Them). Struggling with under-eye texture? Read: Why Does My Concealer Always Crease? A Step-by-Step Guide to a Smooth, Crease-Proof Finish.
Part 5 & 6: Dimension and LongevityA flawless base isn’t just flat. You must add dimension back in and then lock it down.
Melt and Seal: A Setting Spray is non-negotiable. It melts all the layers together for a seamless finish and locks everything in place for hours. Discover our top picks and how to use them here: The Final Step: Does Your Makeup Really Need a Setting Spray?.
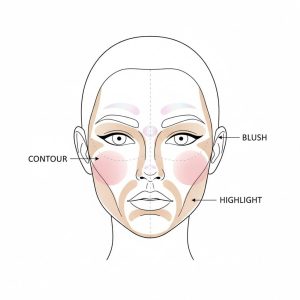
Sculpt & Flush: Use Contour, Blush, and Highlight to bring back shadows and light. For a deep dive into formulas, see our guide: Cream or Powder? Why Your Blush and Contour Formula Might Be Sabotaging Your Look.
Set Strategically: Use a fine, translucent Setting Powder only where you get shiny (like the T-zone). Over-powdering is a primary cause of cakey-ness.
Part 7: The Troubleshooting Clinic – Fixing Common Foundation Problems
- Problem: My makeup looks “cakey.”
- Cause: Too much product, not enough skin prep, or over-powdering.
- Solution: Use less foundation and build in thin layers. Make sure your skin is well-moisturized. After applying, press a clean, damp sponge over your entire face to pick up excess product. Finish with a hydrating setting spray.
- Problem: My foundation oxidizes (changes color).
- Cause: The pigments are reacting with the oils and pH of your skin.
- Solution: Always let a swatch dry down for 10-15 minutes before deciding on a shade. Using an oil-control primer can create a barrier between your skin’s oils and the foundation.
- Problem: My makeup separates or pills.
- Cause: Mixing incompatible formulas (oil vs. water) or not letting skincare absorb.
- Solution: Match your primer and foundation bases (water-to-water, silicone-to-silicone). Wait 5-10 minutes between your last skincare step and your first makeup step.
Part 8: Your Flawless Base Checklist (A Scannable Routine)
- [ ] Cleanse your face.
- [ ] Moisturize and wait 5 minutes.
- [ ] Apply a Primer suited for your skin’s needs.
- [ ] Apply Foundation in thin layers, starting from the center of your face and blending outwards.
- [ ] Apply Concealer only where needed.
- [ ] Add Contour, Blush, and Highlight for dimension.
- [ ] Lightly apply Setting Powder to your T-zone.
- [ ] Drench your face in Setting Spray and let it dry.
Conclusion
Achieving a truly flawless foundation base is a skill, and like any skill, it is mastered through knowledge and practice. It’s not about finding one “magic” product, but about understanding the synergy between your skin, your prep, and your technique.
By using this guide, you now have the complete blueprint of a professional makeup artist. You have the power to troubleshoot problems, choose products with confidence, and create a radiant, long-lasting canvas that feels as good as it looks. Now go create your masterpiece.

